ReadyOp DT provides real time communication and radio access to the ReadyOp Dashboard. Before using the ReadyOp DT application on your device your Administrator will need to add your device to the ReadyOp system. For reference see Devices (Creating a Device) in the access section.
Initial Setup Instructions
The ReadyOp DT app is built to allow smartphones to function as a two-way radio. Fire, law enforcement and other agencies use it daily for radio communications.. Here are the instructions for setting up ReadyOp DT on an Android or iPhone:
| Note: In order to use the ReadyOp DT app, the user will need their own ReadyOp login Username and Password. See your Agency Administrator if you have not been issued your login information. |
You will need the following information from your Agency Administrator during setup. Please contact that person for the following before proceeding:
- The container line code
- Your agency number
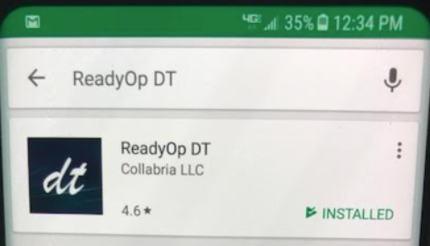
- Go to the appropriate app store for the type of phone (Android or iPhone) and download the ReadyOp DT (add an icon to show the app) app.

- A ReadyOp DT icon should be shown on the phone after the download is complete.
- Install and launch the app. After launch, a login screen should appear.
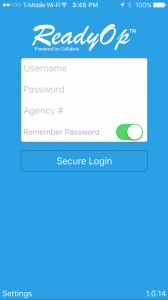
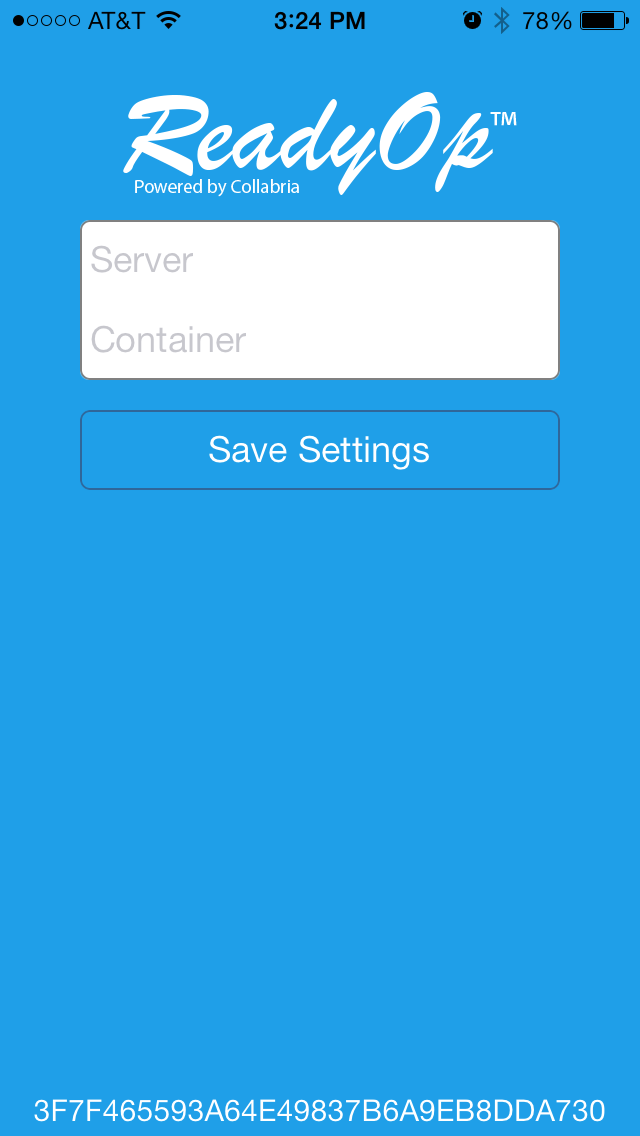
- In the lower left corner of the login screen you will find the word “Settings.” Press on Settings and a new page should appear with a line for “Server” and a line for “Container”.
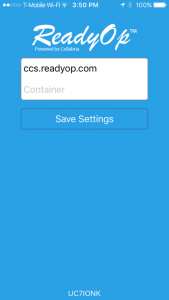
- On the settings screen, fill out the following information:
- For your agency, use the code provided by your Agency Administrator:
- Server line – ccs.readyop.com (Use all lowercase letters)
- Container line – Contact your Agency Administrator or ReadyOp customer service representative to obtain your container (Use all lowercase letters)
- At the bottom of that screen you will see the UUID number for this specific phone. That number needs to be entered in the Dashboard. Copy the number for use in Step 7 below.
- Login into the dashboard and follow the steps here for creating and authorizing your device.
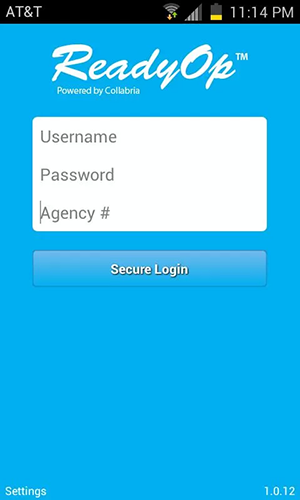
Login
In order to access the ReadyOp DT application you will first need to login the same way when accessing the ReadyOp dashboard. The website address and User credentials for login (Username and password) are created by your system administrators.
The login screen will prompt you for your Username, Password and Agency #. This information can be provided by your ReadyOp systems administrator.
Settings
- To access the settings screen, start by tapping on “Settings” in the bottom-left corner of the screen.
- In the settings screen you’ll have two options, the FQDN or IP of the server and your ReadyOp site name.
- For more information on obtaining your ReadyOp server and site name contact your system administrator.
- At the very bottom edge of the settings screen you’ll also find your devices UUID (Universally Unique Identifier). Your ReadyOp administrator will need your device’s UUID to authorize this device to connect to the ReadyOp system.
- Press “Save Settings” to save the changes to save your new settings.
Menu
The ReadyOp DT menu provides access to the various features accessible through ReadyOp DT. The menu button is located in the top-right corner of the application.

Feed
The feed is an encrypted real time communications feed that is sent to all online users in that particular agency. Including users logged in through the ReadyOp mobile applications. The feed messages are the same that can be found in the ReadyOp system with one exception.
Note: ReadyOp provides access to receive messages via the Feed, however, it does not provide the ability to send messages.
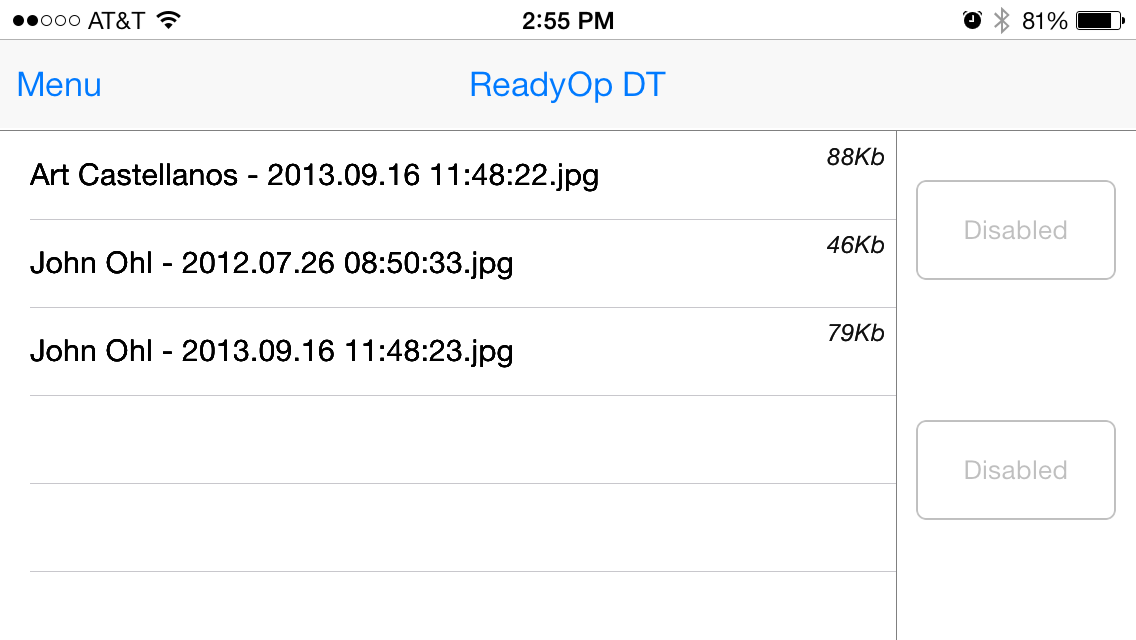
Photos
Photos provides access to images stored in the File Manager in the ReadyOp dashboard. All images in the “Dick Tracy/Photos” directory will be listed here for easy access.
To view a specific images, simply click the name of the images in the list of images. Once the image has loaded, you can then use your phones standard pinch to zoom and drag gestures to move and zoom the image.
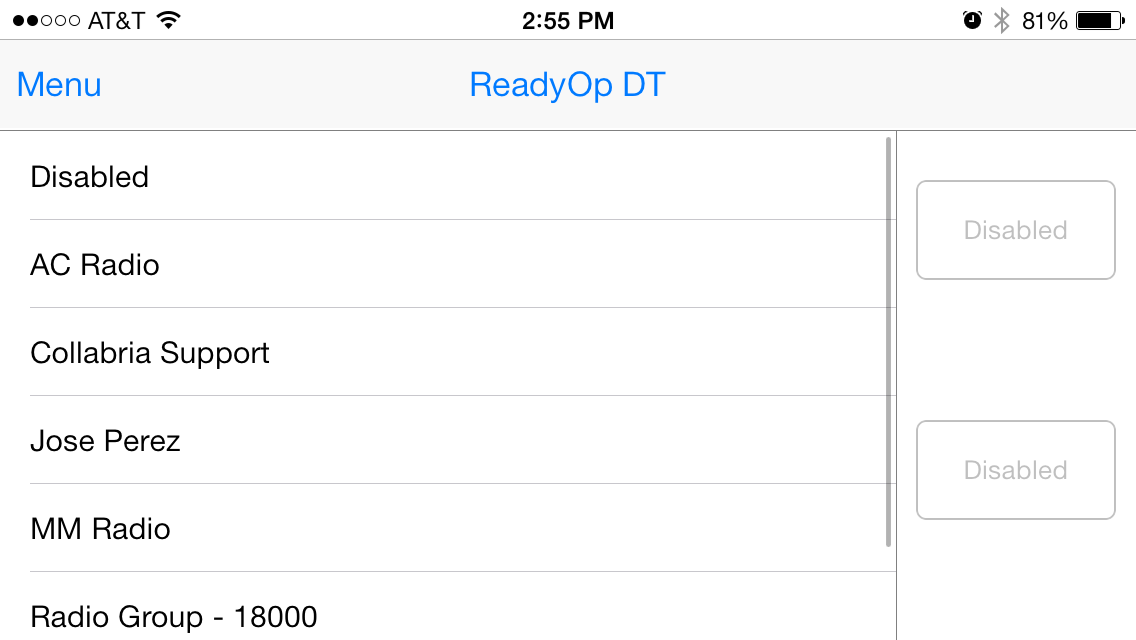
Radio 1 & Radio 2
ReadyOp DT provides simultaneous access to up to two radio channels at a time. To enable monitoring a radio channel, select either Radio 1 or Radio 2 from the menu. In the list of available radio channels that you have permission to listen on, select the channel you’d like to access.
Once you’ve enabled a radio channel, if you have permission, you can talk on the radio channel by pressing and holding the corresponding radio channel button on the right side of the ReadyOp DT application.
When pressing a radio channel to communicate, the button will change from White/Grey to Yellow, indicating that the device is communicating with the server to permit access to the channel. The button will then change to Red and the device will vibrate gently to let you know you are clear to begin speaking.
To disable a radio channel, simply select the first option (“Disabled”) in the radio list for the corresponding channel.
Snap and Send
This feature allows you to take a photo picture from your device and send it to the DT/Photos stored in the ReadyOp dashboard. All images listed here will be available for easy access.
Settings (Androids only)
GPS Tracking
The GPS tracking feature leverages your phones existing satellite and wireless GPS system that provides your location in real time while you remain logged in through the ReadyOp DT App. You will have the option through the Settings menu option under GPS Tracking to enable or disable the GPS tracking feature.