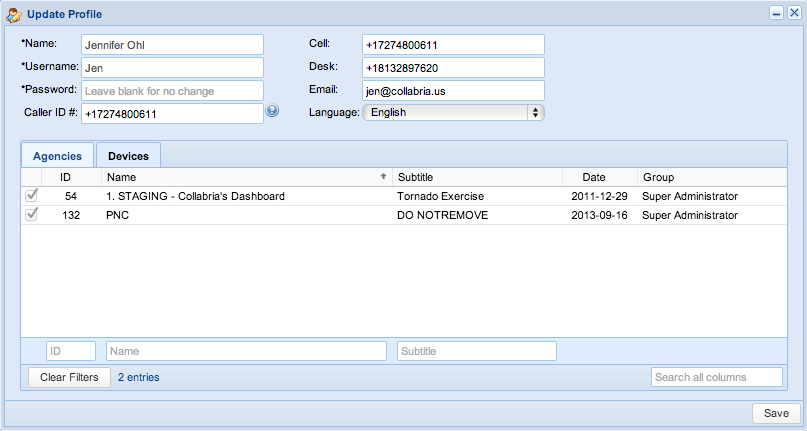
The user profile allows you to update your own user’s information. Here you can update your name, phone numbers, e-mail address as well as password and caller id. You can also use the user profile to view which agencies you have access to as well as which devices you’re authorized to login through.
To access the manage user profile dialog click “Menu” in the upper right corner of the ReadyOp toolbar. From the menu select “Profile”.
Profile Fields:
| Field | Explanation |
|---|---|
| Name | The name that appears to other users when communicating with you via Secure Link/Chat. |
| Username | Your username used to login to the system, this cannot be modified. |
| Password | Your password for logging into the system, leave it empty for no change. |
| Caller ID # | The phone number recipients will see on their caller id when they receive a phone call you initialized through ReadyOp. |
| Cell | Your cell phone number that you’d like to use to contact people via ReadyOp. This is not the same number for your contact in the roster, phone numbers in the roster are used for receiving calls from other users, this number is used for initiating a phone call as a user. |
| Desk | Your Desk phone number that you’d like to use to contact people via ReadyOp. This is not the same number for your contact in the roster, phone numbers in the roster are used for receiving calls from other users, this number is used for initiating a phone call as a user. |
| The e-mail address you’d like to receive replies from contacts with whom you sent an e-mail from ReadyOp. | |
| Language | Either English or Spanish, once changed you’ll need to logout and log back in for the change to take effect. |
Configuring your Caller ID #
The Caller ID # is the phone number that recipients will see when you call them via the ReadyOp system. For example; if your Caller ID was configured as +18132897620, when you make a phone call via ReadyOp, the receiving person would receive an incoming call from +18132897620.
How to change a Caller ID #
- Start by clicking the “Menu” followed by “Update Profile” in the top-right of the ReadyOp dashboard.
- Use the “Caller ID #” input box to enter the Caller ID number you’d like to use.
- When finished press “Save” to save the new number.
How to validate a Caller ID
Due to FCC regulations, your Caller ID number will need to be a number you can verify. This means you must be able to receive and answer phone calls at the phone number specified. It is not possible to change your Caller ID number to a number you are unable to verify. Once you save your profile, you’ll be prompted instructions that will walk you through the Caller ID verification process.
- After saving your profile settings, if your Caller ID number has not yet been verified, you’ll be prompted with the following dialog.
-
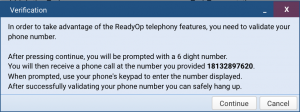
The verification window will walk you through the process of verifying your Caller ID. To begin the process, press Continue.
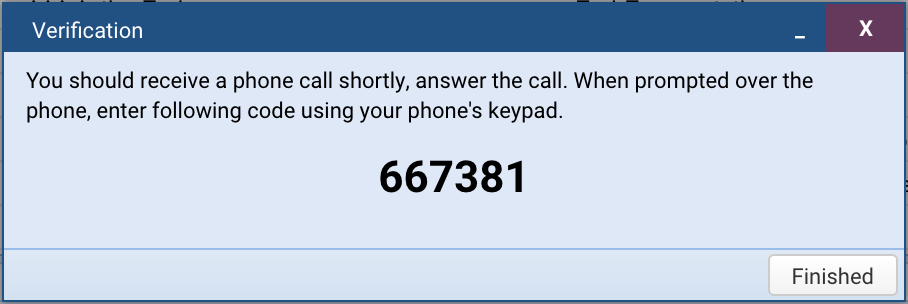
- After pressing Continue the dialog will change and give you a random 6 digit numeric code.
-
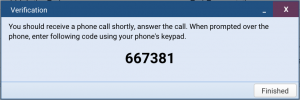
Verification code - You’ll also receive a phone call at the number you provided. You’ll need to answer the phone call and when prompted, enter the number displayed in the verification dialog.
- The automated voice should acknowledge you entered the code correctly and your Caller ID is now properly configured and verified once you hang up.